Pages

Thursday, December 24, 2020

And the rest of the Christmas cards...

 Minus the baking, and freezing, and shopping, and thorough cleaning that usually presages the Christmas season, I had lots of time for card making.  I was so happy to be able to send home made cards to friends and family this year, but of course, I missed terribly the usual pre holiday rituals.  (Well, maybe not the cleaning!)   

How could I resist this Lawn Fawn stamp set?  I used the wreath builder from Gina K to stamp the bubble wreath and then fussy cut and pop dotted the stamped and colored images.


Inside:-


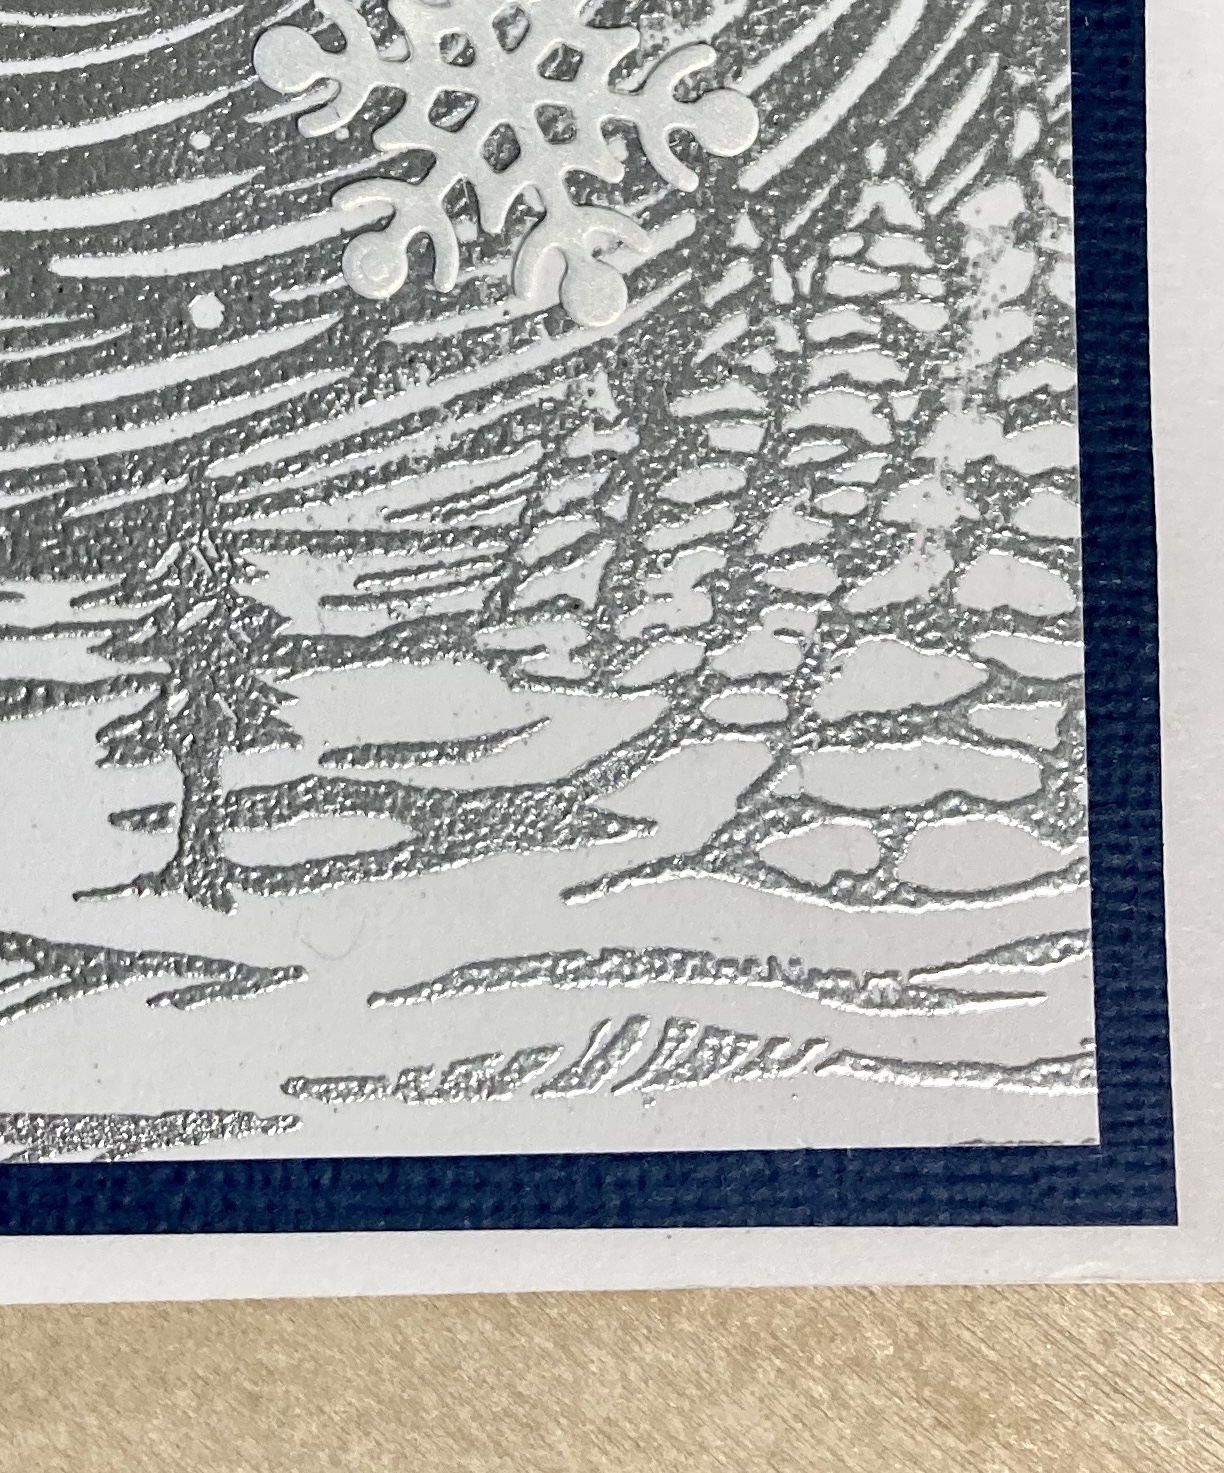
Last year I bought this Tim Holtz snow globe set of dies but didn't have time to play with it.  There are 23 dies in this set!  


Inside:-


Sunny Studio sentiment.


This year's Tim Holtz purchase - Sketch Greenery.  Love the versatility of these stamps.  I got lots of practice with the Misti and masked the holly so that it would sit on top of the rest of the greenery.   The wood grain stamp comes from LaLa Land.  The TH deckle edger is an early present to myself!


Inside:-


Sunny Studio and again with the snowflakes!!!!!!


Here's a spectacular pop up card from Dreaming Tree.  This mechanism is awesome and easily adaptable for many images from Cricut Design Space.


Although I do not like that little edge of the presents showing under the 'snow.'  Wonder how to prevent that edge from showing without interfering with the mechanism?  Hmmm!    


All that remains is to hope you have a very Happy Christmas despite the restraints and disasters.  I wish you all the very best for 2021!   : )  Christine

Monday, December 21, 2020

Another Hero Arts Card for Christmas

 I ordered an 'add-on' with last month's Hero Arts monthly kit - the Etched Winter Scene, and followed the HA directions for its use rather than loading it in my Misti.   It was an interesting technique and I got almost perfect results every time.  I was inspired by this card, but used silver embossing powder for my card.  (I had to justify my purchase of a new heat gun!)   I also discovered that after activating the embossing powder, I could use an embossing pen to touch up the image.  Plus, I was able to embellish the worst areas with the snowflakes!  


Inside:


The little tree is amazing and looks almost like metal.  Sentiment is from Sunny Studio stamped with navy Hero Arts ink.


This was a fun and easy card to make!   Thanks for visiting : )  Christine

Monday, December 14, 2020

Hero Arts - November Kit

 I treated myself - we all need a treat now and then - to a subscription to the Hero Arts Kit of the Month and I am loving all the bits and pieces that come in the kit!   The November kit is perfect for hand crafted Christmas cards and I just had to CASE this slimline card from delandartie.com.


I simplified card and added snowflakes instead of dabs of snow.  The 'Peace on Earth' sentiment is included in the kit.  

The innies:-


Sentiment - Sunny Studio


My favorite card so far...   : )  Christine

Wednesday, December 9, 2020

Hanukkah + Cricut Foil + Slimline Card

 When you have new 'toys' just begging to be played with...


and a Hanukkah card that needs to have been mailed YESTERDAY!  Then...


You find images in DS that can be foiled,  use the new slimline dies on silver card stock,  glue, glue, glue, take awful pictures because you have only 25 minutes to get to the Post Office, address the envelope and add a stamp without noticing that it's one of the new Santa Claus Christmas stamps (Ooops!)  and get the card in the mail with seconds to spare.


Actually, the card is very pretty and it looks like I spent a lot more time on it than I actually did.  Shhhh! 

Happy Hanukkah!   : )  Christine 

Tuesday, November 24, 2020

Have a Safe and Happy Thanksgiving

When I mentioned to my DD that we would probably not be able to invite her family to our Thanksgiving dinner this year, her first reaction was disappointment and her second, an instant later, was joy in anticipation of cooking her own turkey and getting to eat, "all those yummy leftovers!"   There's the silver lining!   It IS going to be a different holiday season this year, but we'll just keep looking for those silver linings and make it the best we can.  Right?


Last year I made these cute matchbook treat holders for everyone.   They contain a Ghirardelli treat and the sentiment "Gobble til you wobble!"   The turkey, naturally, is on a wobble spring and I loved everyone's reaction to the wobbly turkey!  


This year, I had to return to card sending for the holiday and here, after many changes, is my final version:


Designer paper from Carta Bella 'Hello Autumn'

Sunny Studio Pretty Pumpkins stamps and dies

Sunny Studio mat Frilly Frames Lattice

Sunny Studio sentiment from Bountiful Autumn embossed with gold Stampendous embossing powder.


Inside:


Sentiment from Design Space plus text - Folk Art Festival


Version 1 - Distress Oxides for a subtler look on the bolder paper.

Version 2 - Distress Ink for a darker, bolder look on the lighter paper.

Time to clean up the chaos and start on some Christmas cards.    Happy Thanksgiving!   : )  Christine

Thursday, October 29, 2020

Halloween - 2020


 My DDs, bless their little hearts, spend precious time finding birthday cards for me that will make me say, "Oooh!  I can do that!" The cards are a double pleasure and I love each one and add it to my 'Inspiration" folder.    So, when a friend sent me a delightful, delightful little mini accordion book, I was inspired to try one of my own using my Cricut.  How cute is this?


The 'book' is 1.5 inches by 1.5 inches and here is the front and the back:


And another look at the inside.


It was such fun to make in Design Space and I have a Christmas 'book' all ready to cut. (Of course!)


Here's the inspiration from Pam:


Cutest thing ever!   Have you ever seen one of these before?    Love it!   


Here are some other cards I made:


CASE from Sunny Studio and:


I got inky with my Hero Arts kit!      Have a spooky fun time on Saturday but stay safe.   : )  Christine

Wednesday, October 14, 2020

Trying Out the Cricut Foil Transfer Tool

 Being obsessed with foiling, how could I NOT push the buy button for the new Cricut Foil Transfer Kit?  And, so far, it has not disappointed me.  : )   It is easier to use than the Foil Quill since there's no waiting for the tip to heat up and the mat partially ejects before cutting so that you can remove the foil.  You can even use different colors of foil on the same project - think green holly leaves and red berries!  Here are the first two cards I made:


The ginkgo leaf image comes from Design Space and I used the Beadwork writing font which is free with Access.  


Love the gold foil!  However, I attached the sentiment to the image and the Cricut told me to take off the foil and add a new piece to write the sentiment.  I was confused since I knew I had left enough space to foil both parts of the card.  But, I did what I was told and moved the foil over and re-taped.  Well, no.  I did not move it far enough as you can see, the 'T' and the 'h' did not foil properly and there is a scratch under the 'n'.


With my second card, I ignored the request to remove the foil and just sent it back through.  Yes!


Matting the pearlescent paper with foil card stock seemed to make the foiled images 'pop.'   I also noticed that the Maker did not know which size tip was in the clamp, nor did it warn me when I forgot to replace the foiling tool with the cutting tool.  It just debossed the card stock instead of cutting it.  (Filing away that fact for use later!)  

Both cards were simple to make but very pretty.  Now, of course, I need more Cricut foil!!!!   But in the meantime, back to Halloween projects ; )    Stay safe!  Christine

Thursday, September 24, 2020

The Colors of Fall

 I have had a set of Spellbinders Shapeabilities Fall Foliage dies for EVER and use them only rarely because I do not like how solidly monochromatic they look when cut from card stock.   I pulled them out while looking for something to use with my Crackling Campfire Distress Oxide and duh! why did I not think of inking them before?????  I had the most fun getting inky and experimenting with a little of this color and a smidge of that with no clear idea what I was going to do with the finished leaves.  


Then I noticed the scrap paper I had been using under the maple leaves and loved, loved, loved how CCDO looked when layered over randomly placed leaves.   So, I did this - intentionally!


You cannot mess this up!   It looks amazing every time. (Well, I think so!)  I cut the background paper up and found a new-to-me card technique (from Splitcoast Stampers) called a spanner card.  (Pinterest tried to insist that I meant 'spinner card' but it really is called a spanner card!)   So easy to do and lots of hidden areas to decorate. 


 And, since it stands up like a regular card, there's no need for the complicated instructions I have to include with easel and bend cards.  So many ideas...   Please stay safe!  : ) Christine


Friday, September 11, 2020

Falling Leaves

 I keep seeing posts about "crisp Autumn days" and my goodness, I am absolutely longing for those days to arrive here in the PNW!   Last week we had unprecedented heat, high winds and now, a thick blanket of smoke.  There's no danger here, but we have family and friends ready to leave if necessary and head north.

I pulled out my Autumn collection of stamps and found the Tim Holtz 'Falling Leaves' set I bought last year.  Aha!  However, by the time I smooshed, and blended and brushed oxide backgrounds and stamped the skeleton leaves, they did not look in the least "crisp" but I liked them anyway!  


My very first slimline card and I love how much room there is to fill!  I stamped and fussy cut 21 leaves and no two are alike. : ) 


Innies: -


Stitched squares  -  Elizabeth Craft Matting Squares

Sentiment stamps - Sunny Studio

Slimline card mat - Sunny Studio


So much fun and a complete distraction from whatever 2020 keeps throwing at us!  Stay safe  : ) Christine


Tuesday, September 1, 2020

Summer Card

When it's time to send cards and your mojo is focused on last year's Project Life then it's Dreaming Tree to the rescue!   This is the Summer card from their Seasons All Occasions Cards.


Note to self : minus the yellow layer because if one is using gold mirror board, flaunt it!


Not a bad message for this trying year!      : )  Christine

Tuesday, August 18, 2020

Front Panel Step Box Card!

So, I pinned this card forever ago with the idea that I would try it for my sister's birthday.  I like the way it stands up straight and has lots of areas to showcase beautiful paper.  It was fun to make and I enjoyed reading the directions which took me right back to my childhood in England.  I had forgotten that the verb 'stick' translates to 'glue' as in, "Stick the designer paper to the card base."  : )


Here's the card:


I used Graphic 45 paper, Cheerful Daisies stamps from Sunny Studio, and a Tim Holtz die for the sentiment.


And the back -


Love that Graphic 45!       This is my practice card -


made from a Hobby Lobby paper pad.  I like this one too even if it was just to figure out how the construction works.


Note to self  -  remember to keep the embellishments within the confines of the 4.25x 5.5 card base.  I'm thinking of a haunted house on the front panel with ghosts popping up behind, and a full moon and bats on the back panel.   Spooky!     Happy, happy birthday Janty!   Miss you, stay safe, hope to see you soon and then we can PARTY!       : )

Friday, July 31, 2020

Still Masking!

The challenge over at BBTB2 is Cute Critters and since we plucked up courage to leave the safety of our home and go camping, I am very late in posting my entry.   We did enjoy being in our little RV, and seeing friends for the first time in forever, but gathering around a campfire in the evening, all wearing masks and socially distanced just wasn't the same!    The dogs, of course, had no problem circulating and accepting treats or cuddles from everyone.  : )  


Beaver and Squirrel -  Create a Critter
Speech bubble - #M46AC7
Face Mask - #M16706579  and I did a little work with the contour button to make a solid mask.
Distress Oxides - Speckled Egg, Faded Jeans, Shabby Shutters and Forest Moss.
Grass stamp - Sunny Studio


Inside:-


Font is Alphabet Soup


One more critter on the back:-


Mouse - Create a Critter
Mask - #M16706579           

Soooo cute!  After my initial foray into mask making, we bought a box of 50 disposables from a local store.  Whoever could imagine that I would go through that box and have to replace it?   I miss your face!       
Hop on over to Bitten By The Bug and check out the other wonderful entries.   Stay safe!   : )   Christine
 
Blogger Template By Designer Blogs