Pages

Sunday, March 1, 2015

Time To Welcome Spring!

Here in our corner of the PNW, we have had an extremely mild and enjoyable winter - touch wood!  I had to travel to Florida to enjoy the sight of 'snow' on the roof tops!


Sitting in Hogsmeade, sipping hot butterbeer, a card for a very special family member in New York State, popped in my head, inspired by this week's challenge at BBTB2.  I designed it using the I-Pad app. and cut it when I got home.  How cool is that?


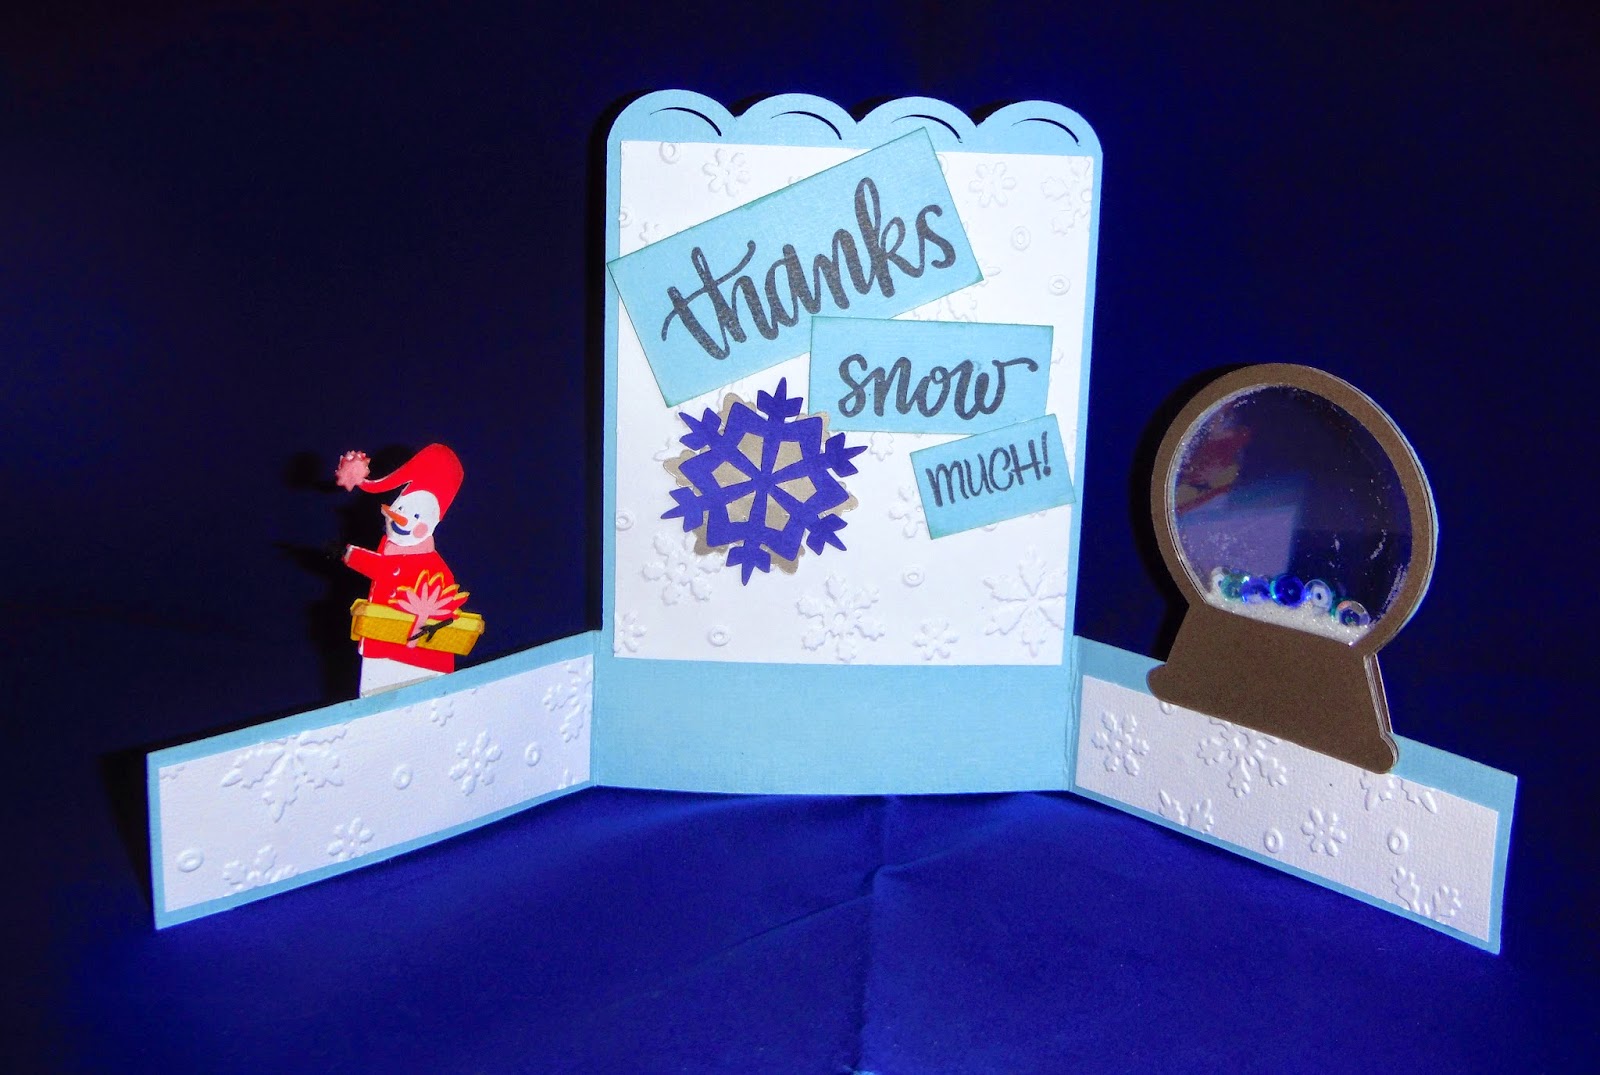
In between loads of laundry, (LOL!) I created the background using the Simon Says Stamp 'Falling Snow' stencil with embossing paste and TH coarse glitter.  The clock image comes from the Picturesque cart and I used this 'framework' image to support the amount of Ultra Fine Flower Soft snow that I wanted to add on top of the clock.


The outer sentiment comes from Gypsy Wanderings and the inner cut comes from the Phrases cart.  I'm still undecided about the 2 substitution for the word "to."   Hmmm.  I added a handwritten note that I was sending warm wishes for an early snow melt plus an invitation to visit us to warm up!


Wow!   I just squeaked my card in on time (!!!) to swell the numbers at BBTB2.  I just love, love, love what the DT did this week.   Pop over and take a look.   Thanks for visiting today.   : ) Christine


Thursday, February 26, 2015

Treat Holders for St. Patrick's Day

This post didn't appear earlier this week, either!   Obviously, I am technologically challenged when packing for a vacation!


The tutorial for these cute, cute treat holders comes from Splitcoast Stampers and is very simple to do, except that I found the measurements a little bit off.  After folding the 6 inch square into a triangle, I scored at 2 and 3/4 inches along the long edge, flipped the triangle over and scored again at 2 and 3/4 inches.


The shamrock was cut on my Explore and I tucked a 'gold' coin in one of the pockets.  The pockets hold a Ghirardelli chocolate perfectly!   Love this design!   Thanks for visiting with me today.  Now to get the washing machine going!  : ) Christine

Happy Birthday Shaped Card - file

We're back - regretfully - from our little trip to The Wizarding World of Harry Potter at Universal Studios and it was amazing! 

Trying to catch up with my emails and I'm sorry the link did not work. Hopefully this link WILL work!   : )  Christine

https://us.cricut.com/design/#/canvas/25199486


Saturday, February 21, 2015

Happy Birthday Shaped Card


I am having so much fun with the BBTB2 shaped card challenge!  I learned, with this one, to make sure that ALL the pieces of the shadow are welded together!  The sentiment comes, once again, from Wild Card 2.


I have to say that the new Design Space is amazing.  I wanted to cut the pieces of the card first and then the embellishments - the candle, gift, balloon and hat.  It was SO easy to select the mats I wanted to cut first without the tedious scrolling I had to do with the previous version.  DS marked with a check mark all the mats I had cut and revisited the ones I had skipped so that all the mats were cut without me worrying about them!  Thank you Cricut!

Here's another view on the window sill so that you can see the glitter.  (Thank you Miss E!) 


Thanks for visiting with me today and don't forget to check out the BBTB2 challenge.  : )  Christine

The file for this card can be found at https://us.cricut.com/design/#/canvas/25199486

Thursday, February 19, 2015

Shaped Thank You Card

I haven't been able to enter the BBTB2 challenge for a while and was determined to do so when I saw this weeks challenge - create a shaped card.  I was in need of a simple thank you card and went in search of a chunky 'Thank You' in Design Space to use on my card.  I found 'Thanks A Bunch' on the Wild Card 2 cart and brought it onto my canvas.

Then it was easy peasy lemon squeezy to duplicate the shadow layer and flip it to make the back of the card.  I moved the two images until the T's overlapped and found that I had to add two small rectangles between the two h's and the two k's so that my card would fold.  Here's the welded shape.


Since it said "Thanks a Bunch" I chose to embellish it with rolled flowers cut from the CTMH Art Philosophy cart.  (Wild Card 2 uses bananas wouldn't that would be fun?)  Wild Card 2 has tons of sentiments that can be made into shaped cards, so I can see myself adding a few to my stash.


Pop over to the BBTB blog and look at some of the other fun shaped cards.  I love Brenda's birdcage and Carolyn's Frozen castle.    Thanks for visiting with me today.  : ) Christine

Here's the DS file if you'd like it!  Thank You Card


Tuesday, February 17, 2015

"Toad - ally awesome" Valentine Card

A quick post with one last Valentine card.  This one was inspired by the cute background paper from Doodlebugs, and is a penny slider card from Lori Whitlock's shop.  The 'toad' somersaults from one lily pad to the other - and to my great surprise, it really works!   : )


The toad/frog and lily pads come from Create a Critter and the sentiment stamps are from My Pink Stamper.   Thanks for visiting with me today.   : )   Christine

Friday, February 13, 2015

Mailbox Card in a Box for Valentine's Day

My family will tell you that I never sing the right words to a song.  Never ever!  In my head, however, I'm just being creative.  : )  When I pick up Master J. for example, I always sing "We're going to Grandma's house" to the tune of "Here we go round the mulberry bush."  There are many verses to this song naming the people, animals and things he will see at Grandma's house and lately he's been singing along and inventing verses just as his Mama did when she was a littlie! 

So, when I saw the mailbox box card from SVG Cuts, I wanted to construct real envelopes containing greetings from everyone at Grandma's house but, had to settle for the trusty Explore writing names on the teeny envelopes instead.  Kinda cute though, don't ya think?


Of course, I know that Master J. will be much more interested in the heart shaped box of candy and the Chuggington book that comes with the card.  LOL!  I'll share the rest of the Love Day stuff next week after it's been delivered.  Happy Valentine's Day!  : ) Christine


Wednesday, February 11, 2015

Heat Embossing with the Explore

Oh so excited today - this is my first blog post for Sheila at She's a Sassy Lady!   O.K. Here goes!

Did you see the new Mix and Match embossing plates from Anna Griffin on HSN?  I'm afraid I caved and bought the set AND took the autoship option.  My shipment came in last week and I love how easy it is to customize cards for specific occasions.


It was my DD's birthday last week and I used the Happy Birthday plate to emboss the front of her card.  So pretty, but it needed embellishing to make it really special and I don't have any Anna Griffin type flowers.  Time to turn on the Explore!

I found several flowers in Design Space that have a shadow layer and a fairly intricate top layer.  (e.g. Bits and Pieces, Gypsy Wanderings, Sophie) After placing the flower on the mat, I ungrouped the layers and changed the top one to 'write' and left the shadow layer on 'cut.' The last step is to select and attach.

Using the Amy Chomas adapter, I inserted my VersaMark embossing pen, loaded the mat with vellum and pressed 'go."


Then comes the hardest part of the whole process - getting the vellum flower off the mat without touching the wet embossing ink!  I had fun trying out several different embossing powders and choosing the best alcohol marker to color the back of the flower.


Love this silver one but decided to go with a silvery white opaque powder to compliment the white-on-white look I was going for.  This technique is so easy and I want to try text, a beautiful butterfly, and maybe a poinsettia with a gold edge.   So many ideas!

Here is the finished card.  She was very impressed!  (Sorry!)


Thanks for visiting with me today!  : ) Christine

Tuesday, February 10, 2015

Jumping on the Lip Balm Bandwagon - Valentine Tags

I found some EOS lip balm at my local drug store! Yesss!  The next step was to design a tag to hold the balm that I could attach to our DGD's Valentine Candy.   Two weeks later, after designing and discarding several things, I finally decided on a simple 'Love' theme rather than the flowers, bears, owls and hearts that I've been seeing all over the Internet.

If you need a video tutorial on making a holder, I suggest you pop over to see the one done by Sheila at She's a Sassy Lady.  I followed her directions and used the slice tool to cut out a 1.45 inch circle in all the ungrouped layers.  Easy Peasy Lemon Squeezy!


The 'Love' shape comes from Home Accents, and the 'I heart you' from Create - a - Critter.  The tag is from Bits and Pieces.  And look, Circle Sisters, I finally found some Memory Thread to add to the seam binding bow.  (It is so long since this was in vogue over on the Circle Board that it's due for a comeback!  LOL!)


Don't forget to come back tomorrow to see my first ever DT post for She's a Sassy Lady.  So excited!   Thanks for visiting with me today.  : ) Christine

Wednesday, February 4, 2015

Hello Kitty Valentine

Yesterday was my Card and Craft club meeting and the challenge theme was 'Love Letters."  Our supplies included some cute, cute paper from Doodlebug Designs, sheer ribbon, a bling heart and a pink paper clip.

I had several ideas but it wasn't until Master J. told me, mournfully, that his yellow balloon had popped, that the idea of Hello Kitty stuffing heart shaped balloons into a mailbox flashed into my mind.  (As for Master J. well, we drove right over to the grocery store and bought him a mylar balloon, and a car, and some milk to justify going!)

Here's my card.


Of course, the Hello Kitty carts do not have Hello Kitty standing by a mailbox with heart shaped balloons so this image is put together from three other cuts and some creative scissor work.


The sentiment inside comes from the 'Better Together' Imagine cart and I used the 'unflatten' button to separate the layers, then 'hid' the label layers so I could just print then cut the sentiment.  Love it!  (Now I just need to be able to change the colors on the image without obliterating the details.   It's on my wish list for future updates.)


The hardest design element was that pink paper clip and I ended up cutting out one of the envelopes from the background paper and clipping it to the inside.


I am linking my card with the Valentine's Day Challenge # 244 at the Fabulous Cricut Challenge Blog and the Craftin Desert Diva's Red, White and Pink Linky Party.  Pop over for some Valentine's Day inspiration.


And, of course, I had to leave my card in the store for display, so I recreated it last night for my Hello Kitty lovin' DGD, Miss G.  Shhhhh!   Thanks for visiting today!  : ) Christine

Monday, February 2, 2015

DIY Valentine Treat Boxes

Happy Groundhog Day!  It's raining quite steadily, so no-one is going to see a shadow today.  Yeah - an early Spring! 

Time to get the February treats done for the children at OHM and this month, I thought that I would make a heart shaped treat box.  This one comes from SVG Cuts and I sized it so that 4 would fit on a 12 x 12 sheet of cardstock.   To speed up the process of putting the boxes together, I used narrow double sided tape rather than glue. 


The hard part for me was my decision to include a variety of stickers with the boxes and let the kids decorate their hearts for themselves,  Aggghhh!  Bling withdrawl!  


You can see that I could NOT leave them entirely plain, and added a punched border, and a conversation heart saying written by the Explore on a banner.


Now I need to run to Michael's for more clear bags. ( I don't think for one moment that that's all I'll get, though.  LOL!)    Thanks for visiting with me today.  : ) Christine

Thursday, January 29, 2015

Sympathy Card

The new barn is almost completed!  DH is sorting and labeling 40+ years of 'stuff' and storing it in the cabinets we rescued from our kitchen remodel.  I was inspired to reorganize my craft supplies starting with my paper collection.  As my little sanctuary became messier and messier, I really doubted the wisdom of trying to reorganize and downsize.  However, now that it's done, I am SO happy with my room.  Yeah!

I was totally, totally, amazed at how much purple paper I have accumulated!  But I loved sorting it out and admiring all the shades and hues.  So, when I sat down to make a sympathy card for this week's BBTB2 challenge, I was very happy to dip into my purple stash.

 Most of the sympathy cards that I make, are mailed, so I try to keep them as flat as possible.  I like to add a mat, and embossing for texture and interest  I love these little flowers from the Sophie cart and the Explore cut them perfectly.  That's a quarter sitting besides the top layer of the flower.  Amazing!


The leaves are from Stretch Your Imagination, and the mat comes from Artbooking.  I chose the sentiment from the Phrases cart, but went back later into my DS file and replaced it with the "With Sympathy" sentiment from the Jasmine font cart when I saw it used on the cards by Maureen and Sharon.  So pretty.


For the inside, I used my new stamps from Robin, My PinkStamper.


I have to have a selection of Sympathy Cards in my stash since they are so hard for me to make.  If you are like me, I suggest you pop over to BBTB and scraplift a few of the DT cards.  It's on my ToDo list!   Thanks for visiting with me today.  : ) Christine

Wednesday, January 21, 2015

Valentine Lollipop Holder

Sometimes the Laws of Physics just get in the way!  I had the idea to take Mary's (SVG Cuts) little house candy cane holder and turn it into a lollipop holder for the DGDs for Valentine's Day.  Since they love puppies, I decided to use the dogs from Paper Pups to decorate the house.


It went together very easily, and I had such fun decorating it with lace, and puffy stickers, and punched out hearts.  The problem occurred when I tried to load up the lollipops.   I hadn't thought about them being top-heavy and, of course, the minute I stuck them through the holes in the roof they fell out!  Hmmm!


Three days later, I managed to get them to kinda, sorta stick in there.  LOL!   I also have accumulated lots of assorted lollipops as I tried to find the brand that was the least top heavy.  DH, being the person who understands Physics in this family, has an idea for the next one.  Right!


Master J. is not here today, but Cocoa was very interested in the photography process.  Thanks for visiting with me today,   : )  Christine


Sunday, January 18, 2015

More snowflakes!

When I bought my first Cricut in 2009, I noticed how I 'Cricut-ised' so many of my paper crafts and projects.  I made banners, posters, signs, thematic wall decor, flash cards and game pieces for my Kindergarten classroom to name just a few of my Cricut-ised projects.

Nowadays, with the Explore able to cut such a variety of materials, it is automatic for me to use my Cricut for even more diverse projects.  

Master J. was visiting on Friday, and I thought we would make bird feeders with paper tubes smeared with peanut butter and rolled in bird seed and placed in the bushes around the house.  But then my Cricut-ising brain kicked in and I thought that it would be MUCH nicer to have bird seed snowflakes hanging in the branches.  I cut the snowflakes from heavy card stock and reinforced the holes punched in the ends with eyelets.  I used snowflakes from Accent Essentials, Winter Lace and Classroom, December and January.


Master J. had such a lovely, sticky time spreading peanut butter on his snowflake and smooshing down the bird seed!   He was very proud of his efforts and wanted to take one home to show his Mama.


Here they are in the garden brightening up the currant bush.


The current BBTB2 challenge is to use a Cricut snowflake in a project.  Run over and take a look at the wonderful variety of snowflakes that the DT and the participants have used!  Thanks for visiting with me today.  Stay warm!   : ) Christine

Thursday, January 15, 2015

Snowflakes

So last week I cut out tons of snowflakes for a 'Frozen' party.  I imported the jpeg into Design Space and cleaned it up with the magic wand and voila!  Easy Peasy! 

I also had a jpeg of the birthday girl's name which I imported the same way.  Sooo easy.  Design Space does not yet allow you to draw an offset shadow around the image - but I hear that it is coming!  I opened up the Silhouette Studio and imported the jpeg, traced and offset to find all kinds of problems due to the internal spaces in the letters.  Score one for the Explore!  (But I'm not ready to donate the Cameo just yet!)  I cut the name twice, once in beautiful glitter paper and once in white shimmer paper to create a drop shadow.  Tres pretty! 

The BBTB2 challenge this week is to incorporate a snowflake from a Cricut cart, and I had cut 2 beautiful snowflakes from the Frozen cart for the name banner and forgot to take pictures!  I had resized a little bag from Tags, Bags, Boxes and More for the OHM children's January treat and had the notion to add a couple of Shrinky Dink charms, a snowflake and Olaf, to a twine bow that they could remove and use as bracelets.   I bought some Graffix Printable Shrink Paper and was so pleased with the way Olaf and the snowflake printed.  I welded a circle on top of each piece to make it a charm. 

However, when it came to cutting, the Explore could not read the print marks because the paper is so reflective.  I worked around this using a paper mask, but the process was so onerous and I needed so many, that it was just easier to fussy cut them by hand.  Here's the charms:-


And here's the finished bag.


One of the other features that the crafters in my Facebook group keep asking for is the ability to write block letters rather than just outline.  You can see that I filled in the sentiment with Stickles rather inexpertly!


I have another idea for a snowflake craft with Master J.  Watch this space!   Thanks for visiting with me today.  : ) Christine


Sunday, January 11, 2015

Snowman Thanks Card

Last one, I promise!   This is a q&e make using the Winter Woodland snowman.  I used to make this one for my students after Christmas and had to redesign it in Design Space this year.


  The background paper was printed using my Imagine.  (Looove this snowflake design and use it all the time!)


Now to get to work on the OHM children's January treats.   : )   Thanks for visiting with me today.  : )  Christine

Wednesday, January 7, 2015

'Frozen' Snowflake Box Card

It was my Craft and Card Club meeting yesterday and the challenge theme was "Baby It's Cold Outside!"  What could be colder than "Frozen?"  Right?   I had this SVG Cuts box card cut out before Christmas, but didn't get around to assembling it, so I was able to incorporate the challenge pieces - paper, clothes pin (again!!!!) and blue doily.


Mary's design included a church in the snow globe, so I trimmed it away and attached Elsa's castle from the Cricut Frozen cart.  I outlined the details with Stickles to make them pop a little.  I used Print Then Cut to make the three Olaf images on the sides and back.


The sentiment "Warm Hugs" comes from the cart, too.   "Brrr" comes from Winter Frolic and I disassembled that darn clothes pin and used it for the exclamation mark.


I had SO much fun blinging it up!  Here's a picture taken on the window sill so that you can see the vellum insertion.  


I hated leaving my card at the store for display with all the other wonderful cards!   Do you feel like that sometimes?

While I was making my card, I was thinking of the "Winter Fun" challenge at FCCB and the Blue and White Linky Party at Craftin' Desert Diva's.  Pop over and see their inspiring projects.  Thanks for visiting with me today.  :)  Christine

Thursday, January 1, 2015

Snow Globe Thank You Card

Happy New Year!   I am, however, still working on those 'Thank You' cards!  Here's the back story...

 Master J. is a huge 'Cars' fan and as instructed, (ask me about THAT some time!)  we bought him a set of the Cars characters from the Disney Store.   He was thrilled to unwrap them on Christmas morning and then waited impatiently for Grandpa to undo each of the little twist ties so that he could play with his new toys.  Grandma, meanwhile, had her eyes on the sturdy acetate in the discarded box.

 And here's what I did with part of it - made a snow globe shaker card!  It is based on a card created by Sharon Langford with her gypsy girl.   She included a screen shot so it was quite easy to make a similar card in Design Space.

 The problem came when I tried to open the saved design and found that the 'weld' bug had struck and parts of the card were missing.  I was able to fix and cut the card but it would seem that now the file is badly corrupted and cannot be cut again.   : (    I think that this is a known issue and may be fixed in the next update.   Fingers crossed!


 I used the snow globe from the Doodlecharms cart and the snowman from Snow Folks.   He is carrying a sled but I trimmed that down and added a present from Something to Celebrate.  As you can see, I had a little trouble lining up the mirrored cuts!  The globe was cut 8 times and glued together with the acetate in between the first and second cuts and the seventh and eighth.  I added coarse glitter and sequins.  I prefer to make the shaker mechanism like this because I always lose the glitter in the foam tape when I used the more conventional method!


The sentiment stamps came from my Simon Says Stamp kit and MCT and the embossing folder comes from Darice.   I'm returning the acetate to Master J. in the form of this card, tomorrow.  Hope he likes it!   Thanks for visiting with me today.   : ) Christine
 
Blogger Template By Designer Blogs